


Helpful Hints When Publishing Your eBook and Paperback on Amazon KDP
The process is simple, but there are things you need to prepare and watch out for

I have more than ten books published on Amazon KDP, and I could definitely say that the process gets easier each time.
The first publication will always be the hardest, but this should not prevent you from opening this door of opportunity to expose your gift to the world.
There may be many things to consider, but the process is really quite simple.
Here are the four things you need to do to publish your first book on Amazon:
1. Register for an Amazon KDP Account
2. Upload your manuscript
3. Upload your book cover
4. Fill in the book details needed by Amazon
And that’s it! If you have been thinking about it for a long time, and you have been deterred by all the details and write-ups you’ve read, now is the time to conquer your fear.
You can publish your book. It’s not an impossible task.
What many people fear are the details you need in between, but you can prepare yourself for that.
For a start, you can read Amazon’s own guidelines on publishing at KDP Jumpstart.
You can also start by reading their eBook Manuscript Formatting Guide or their Build Your Book — Format a Paperback Manuscript (Word for Windows).
Before reading them, however, you may wish to proceed with the helpful hints I have noted below. These are the things that can be useful to you even if you have already published your first book.
I’ve always wanted to simplify my writing and publication process so I have tried to summarize the things I need whenever I publish a book on Amazon.
Helpful Tips for Kindle eBook

1. Book title
Your book title should be informative and attractive to readers. It should catch the reader’s attention as well as give an idea of the benefits they can get by reading your book. If your book is meant to entertain, the title should have that kind of vibe also.
If you can incorporate keywords in your book title, it would be better. You can also consider including them in your subtitle.
2. Book description
The book description should be concise but not vague. It should give enough in order to grab a reader’s interest but it should not have spoilers that would prevent people from buying your book.
When publishing on Amazon, it is also important to consider the font and style of your words. You can use the Kindlepreneur Book Description Generator to help you format your book description. You can easily highlight the words you used and make them bold, italic or underlined according to your preference.
3. Keywords
You can enter up to seven keywords to help readers find your book. Don’t just enter generic keywords (i.e. poem) if your book is a collection of poems. Use more specific ones e.g. love poems, poems about grief, etc.
4. Categories
You can enter up to two categories for your book. For my latest book that contains a collection of my poems on grief, I have used the following categories:
Nonfiction > Poetry > Subjects & Themes > Death, Grief, Loss
Nonfiction > Self-Help > Death, Grief, Bereavement
5. Book cover
I usually use a book cover with a jpeg format and a dimension of 2,560x1600 pixels. For more guidance, you can refer to Amazon’s help topic Create an eBook Cover. If you plan to use the same book cover in your book’s Paperback copy, use at least 300 DPI resolution.
Use your creativity and find professionals that could help you if you don’t have the skill yet to design your own book cover.
Your book cover should be good and attractive even if in thumbnail size. Remember that people who would browse for your book would not necessarily see your full-sized book cover while doing so.
If you feel confident in designing your own but you don’t want to invest in expensive software, you can download GIMP for free.
6. Your manuscript
If you are not doing picture books, uploading your manuscript is as easy as uploading a Microsoft Word document.
There are other things, however, that you also need to consider:
· Be sure to have a Title Page that contains the same title of your book you would submit to Amazon later on. Also check that the author name you have written is correct. Wrong spelling here is one of the most common errors that could have your book submission rejected by Amazon.
· Set Line spacing of your document to Single.
· Include a well-formatted Table of Contents (TOC). For an eBook, your TOC should not contain page numbers, but must only link to the pages being referred to.
· Refer to Amazon’s eBook Manuscript Formatting Guide for more information.
7. Pricing
If you have no idea yet regarding the price you should set for your book, Amazon has KDP Pricing Support (Beta) to help you.
The button for this service would appear under Royalty and Pricing while filling the information required by Amazon to publish your book. Just click View Service to find out the price recommendation for your book. You will then be asked if you’d like to use the list price suggested. Click Yes to approve or No, back to Rights and Pricing to submit your own price for the book.
8. Final check
A MOBI file would be available for your download and review after uploading your manuscript to Amazon. You can also click Launch Previewer in order to see what your eBook would look like later on.
Helpful Tips for Paperback

1. Your book cover
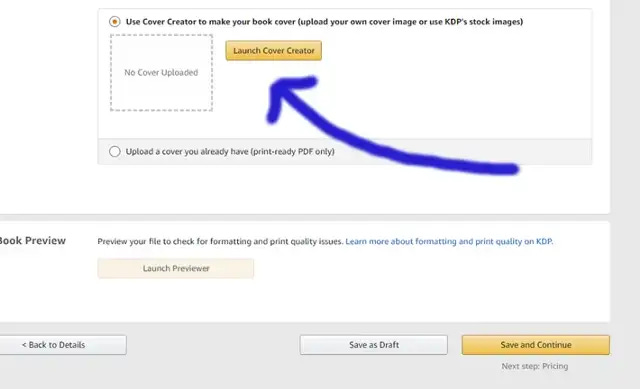
When uploading a book cover, Amazon gives you two options.
One is uploading a cover you already have, which should be print-ready PDF only. I use the other option which is using a Cover Creator.
When you use Cover Creator, you can also choose to upload the front cover of your book, which can be similar to the one you used in your eBook. You just have to make certain adjustments to it.
To start with the process, click Launch Cover Creator under the Paperback Content tab of your book submission.
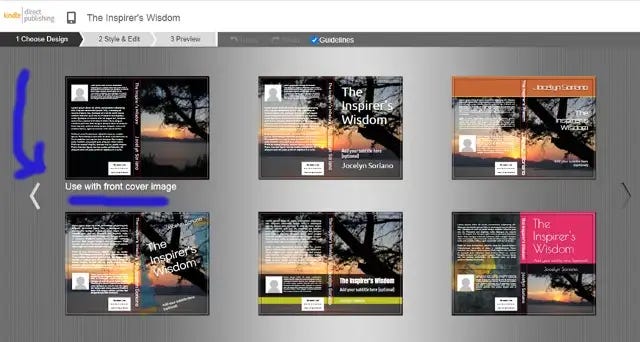
You can then choose among the different book designs they have and then edit them according to your preference.
I usually use the first book design that allows me to upload my own front cover image (the one I used for my eBook).
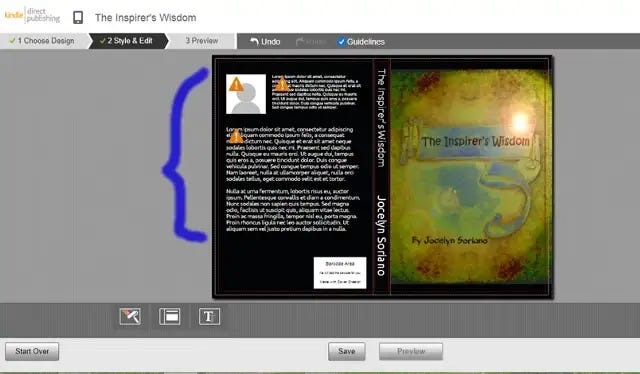
You are nearly done if you have already prepared a book cover for your eBook above. If your cover has less than 300 DPI, Amazon would give you the chance to provide a higher resolution image or to adjust the one you have. (Adjusting could be as simple as dragging your image into a smaller size, which worked for me!)
After uploading your front cover, you’d be asked to also upload your Author Photo, and then paste the other information needed for your book’s back cover such as Author Bio and Book Description.
2. Print options
After designing and/or uploading your book cover, you would have to decide on whether it should have a matte or a glossy finish. Amazon would let you choose the one you like, and since the last time I published, there was no price difference whichever one you decide to choose.
For the interior of the book, you may choose any of the following:
· Black & white interior with cream paper
· Black & white interior with white paper
· Premium color interior with white paper
Note that a colored interior would have a higher cost.
3. ISBN
You can provide your own ISBN for the book or let Amazon give you a Free KDP ISBN.
4. Font size
Your reader may be able to adjust the font size of your eBook, but this is not the same with your Paperback. Once you decide on the font size, that would be the one that would be printed for those who purchase your book. Make sure it would be large enough to be read even by those who don’t have keen eyesight.
5. Book size
I usually choose 6x9 in for my book but you can decide for other settings presented to you by Amazon. Just be sure that you apply the correct size when you submit your manuscript. Your book size and margins should be adjusted to avoid any errors in the final submission of your book.
6. Margins, page numbers and footers
Make sure that your texts are within the margins of your book. This includes even the page numbers you may have included in the footer of your book. Check the footer settings and adjust the footer position so that your page numbers would not be outside the margins you have indicated for your book.
7. Table of contents
Your Table of Contents should now indicate the corresponding page numbers for each heading of your book. Be sure that these are correct.
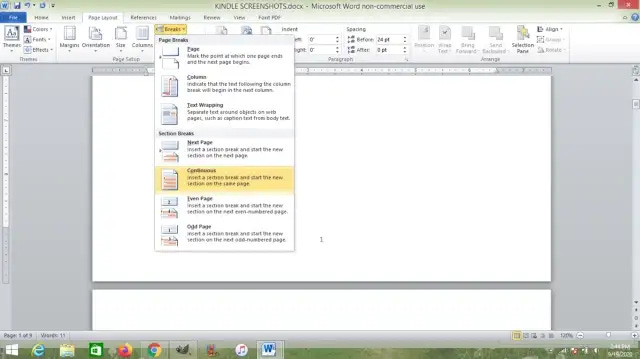
Also, under Page Layout of your Word document, add a Continuous section break for the page where you want to start Page 1. Otherwise, your Table of Contents would begin counting the pages beginning from your Title Page.
8. Final check
Click Launch Previewer to see the final outcome of your book. Here, you will see if there are errors that need to be fixed before your book can be approved for publishing.

Final Words
Publishing your own book would never be without its challenges. But it need not be an impossible task either.
You only need to simplify things first so that you won’t be overwhelmed by all the details you would encounter later on.
You can use the above guidelines to help you in your writing journey. The world is waiting for the stories you’d tell and for that voice, which only you could possibly give.