Even if my main job is writing, I can’t help but educate myself on the latest technology for creating and enhancing images. After all, it’s rather tedious to look for appropriate photos relevant to my posts each time. Sometimes, it’s easier to create your own with the help of Artificial Intelligence.
When it comes to doing so, my favorite tools are the ones I use on Canva. Canva has developed in such a way that it no longer just provides simple editing for your images. It is now a forerunner when it comes to AI technology when it comes to multi-media presentation.
Here are some of my favorite AI tools on Canva when it comes to creating, editing and enhancing images:
1. Creating Images, Graphics and Videos (through Magic Media)
Canva has AI tools to help you generate an appropriate media for your needs. Simply choose the Magic Media icon first on the sidebar.
You will then be presented with three tabs and you can choose whether you want to create Images, Graphics or Videos.
Images:
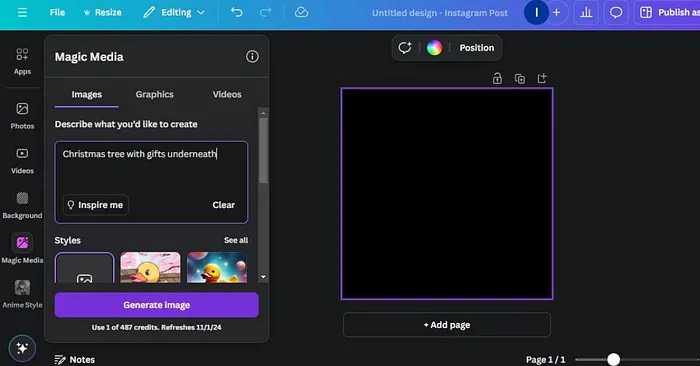
Let’s try to create a simple image. Simply type and describe in the box the kind of image you want it to generate for you. Here, I typed “Christmas tree with gifts underneath”. Then click the button “Generate image”.
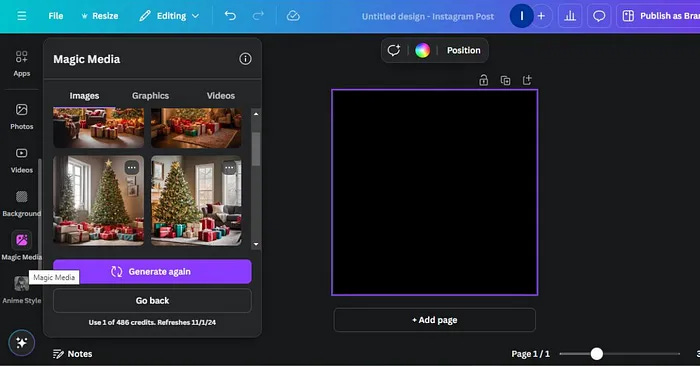
It will give you four images and you can pick the one you like best!
Graphics:
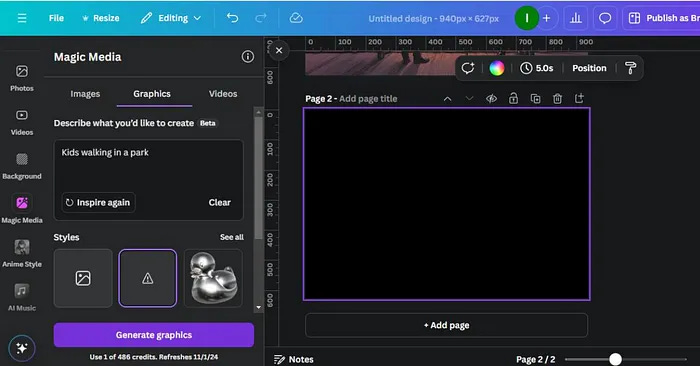
For this exercise, I tried to create graphics for “Kids walking in a park”
Here’s the result:
Videos:
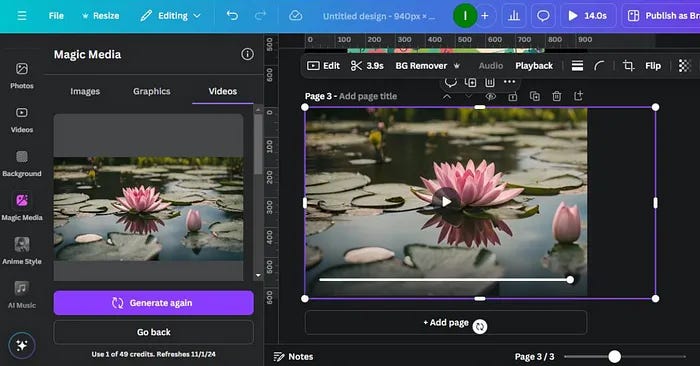
The text describing the video we want to generate for now is “A wide shot of a water lily floating in a pond”.
Here is the screenshot of the video:
Bonus Tool
While this may not be about images, Canva’s AI tool in creating music would be very useful if we want to put some music in our videos.
Let’s try to make one.
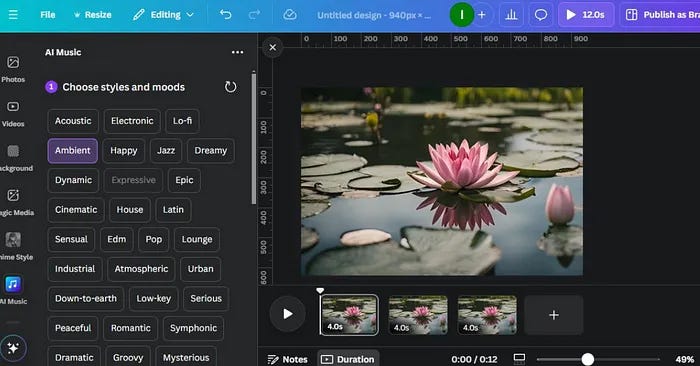
Choose the AI Music icon on the sidebar. Then choose the type of music you want to create. Here, I chose “Ambient”.
You can also set additional parameters as well as the duration of your music between 5 to 300 seconds. I chose only 10 seconds of music since the video clip rendered previously was only 4 seconds.
2. Magic Expand
I use this AI tool very often, especially after I generate a square image that I want to turn into a more panoramic size.
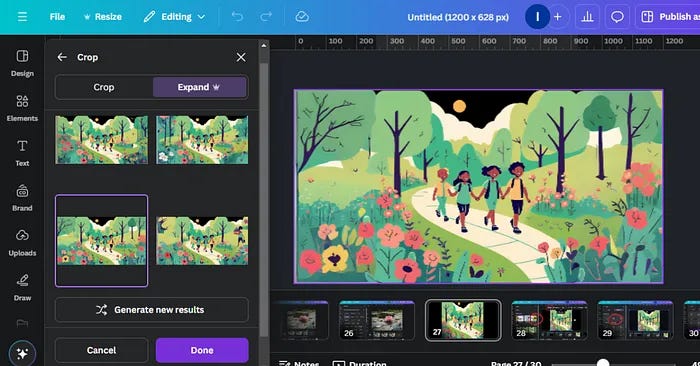
For this, let’s use the image of kids walking in a park that we rendered above. Click the image and then choose the Edit button above it. Next, go to Magic Studio in the sidebar and choose Magic Expand.
We will now choose “Whole Page” for the size.
Now, click the “Magic Expand” button.
Pick from the 4 images rendered and click “Done”. We now have an expanded park!
3. Background Remover
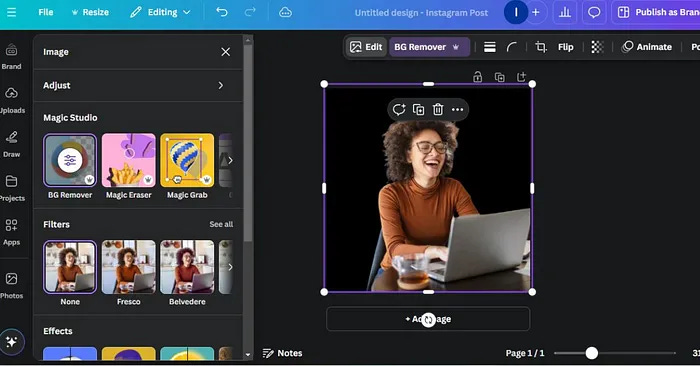
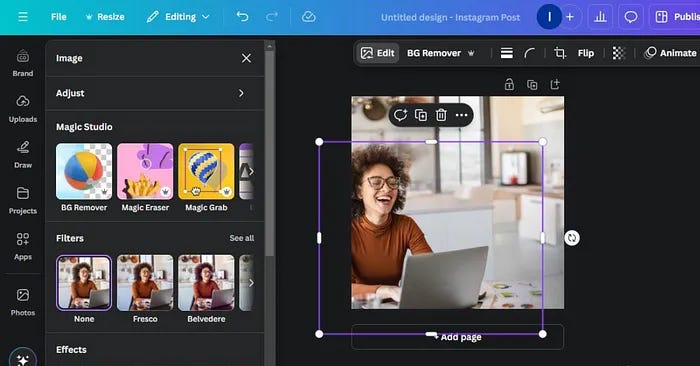
This one is very useful. Sometimes, you are happy with the main character in the image but you want to use a different background. To remove it, click the picture, choose “Edit” and go to Magic Studio again to pick BG Remover.
Here is the result:
4. Magic Grab
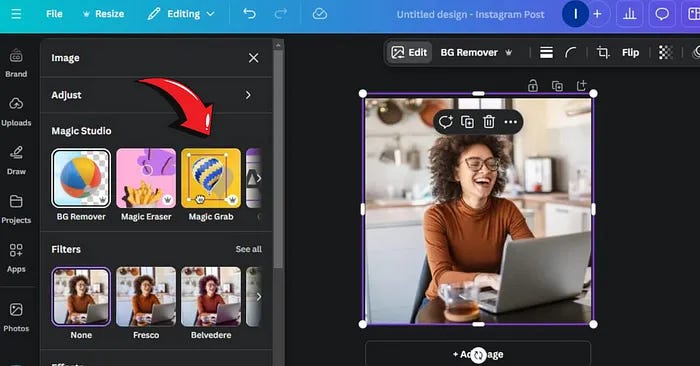
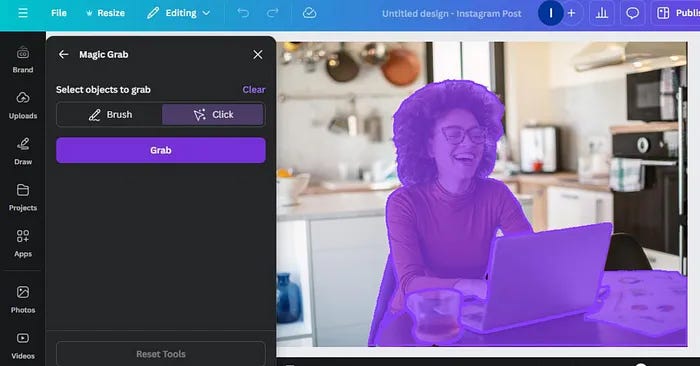
Sometimes, you are already happy with the background, but you want to move the other parts of the picture in another area. In this photo, you may want to move the woman to the left.
Let’s edit the photo again, go to Magic Studio and choose Magic Grab.
You will be asked to click on the parts of the photo that you want to grab.
After grabbing it, you can now move that part of the photo wherever you want. You can even delete it and the background would remain! But here, we merely move the woman to the left.
5. Magic Erase
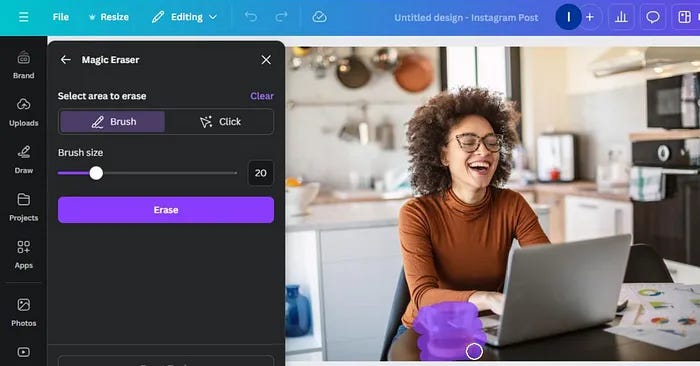
Are there parts of the photo that you want to simply erase? Magic Eraser can help you with that. Edit the photo again, go to Magic Studio and choose Magic Eraser this time.
You can use either click on the part of the photo you want to erase or use the brush to do so. Let’s use the brush for now to erase the coffee cup.
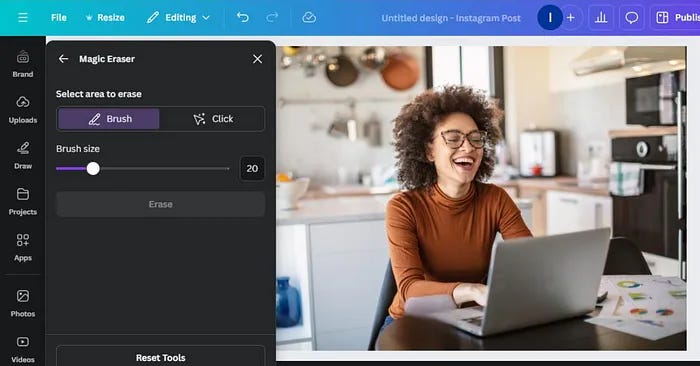
Here is the photo without the coffee cup.
6. Magic Edit
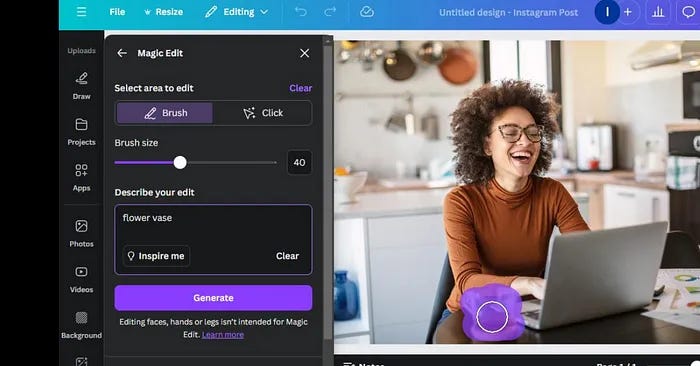
Instead of erasing the coffee cup, while not replace it with a vase? If you want to do that, choose Magic Edit this time. Then select the object you want to edit such as the coffee cup.
Next, write what you want to replace it with such as a “flower vase”. Click the “Generate” button.
You will be given four images to choose from. If you are not happy with the results, click “Generate again”.
7. Grab Text
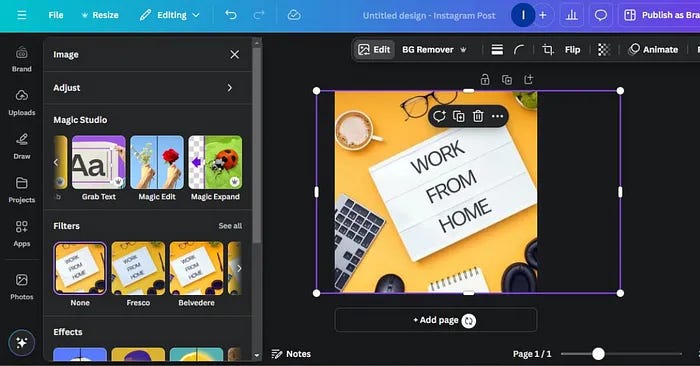
You may want to use this feature from time to time. Here, the photo contains text that you want to edit to better fit your needs.
From Magic Studio, choose Grab Text.
Click on the text you want to edit. Here, we want to edit the word “WORK”.
After grabbing the text, I edited it and typed “earn”. Here is the resulting image:
Choose the tool that would work best for you
Canva has more AI tools for writers such as its “Magic Write” that can help you generate content to start up your writing. But I found myself using the above tools quite often.
In addition to helping me find the appropriate images for my posts, they also shorten the time I need to create graphics and videos from time to time.
What about you? What AI tools have you found useful when it comes to your work as a writer or freelancer?
You may want to upgrade your subscription to have full access to our Tips for Writers and Freelancers.
You may also want to check my book “How to Earn Money by Becoming a Full-time Writer”











I use this for album covers and music videos!